How to use the Pro Mini nRF52 (nRF52832) with PlatformIO
Adding a New Board Library
Following the steps below will enable the PlatformIO extension in Visual Studio Code to compile and upload code to an nRF52832 chip or Pro Mini nRF52 board.
Note: If you already have the Nordic nRF52 platform installed in PlatformIO, you can skip ahead to step 8…
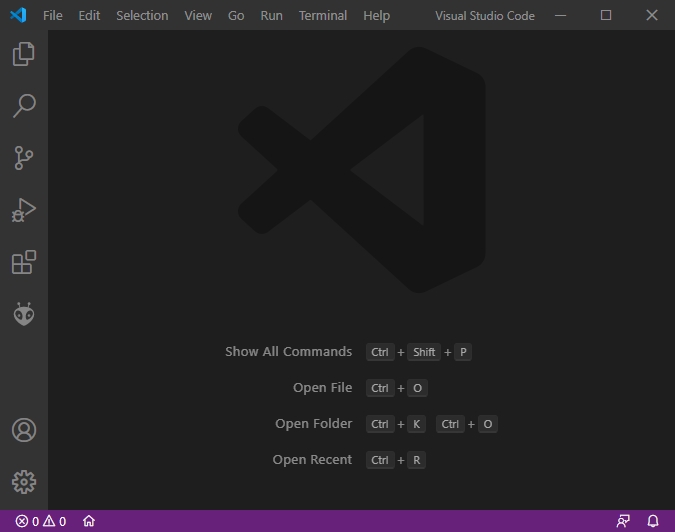
Step 1: Launch Visual Studio Code.
I’m using version 1.49 in the screenshots that follow.
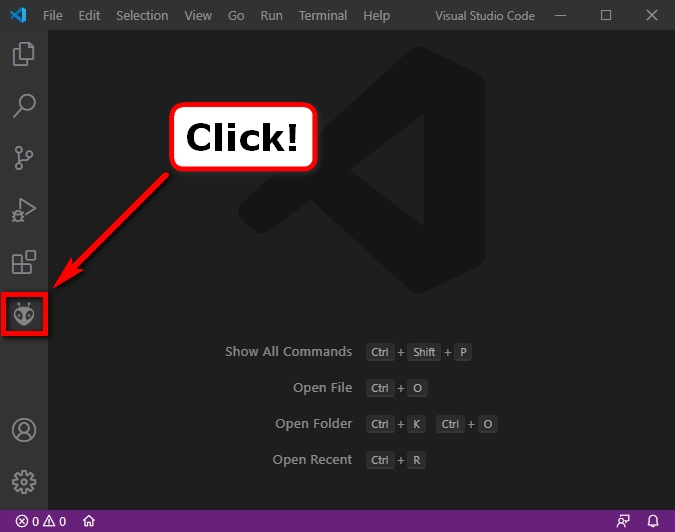
Step 2: Click on the PlatformIO extension button.
Note: If you don’t see the button highlighted below, the PlatformIO extension may not have been installed correctly. See this link for help.
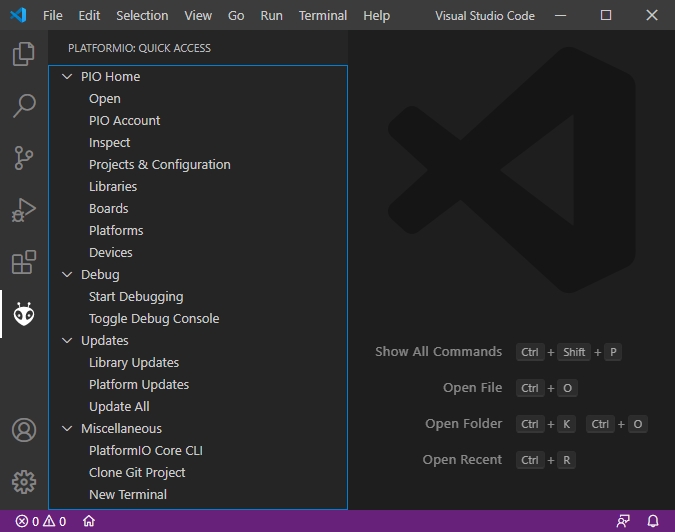
The follow quick access menu should appear…
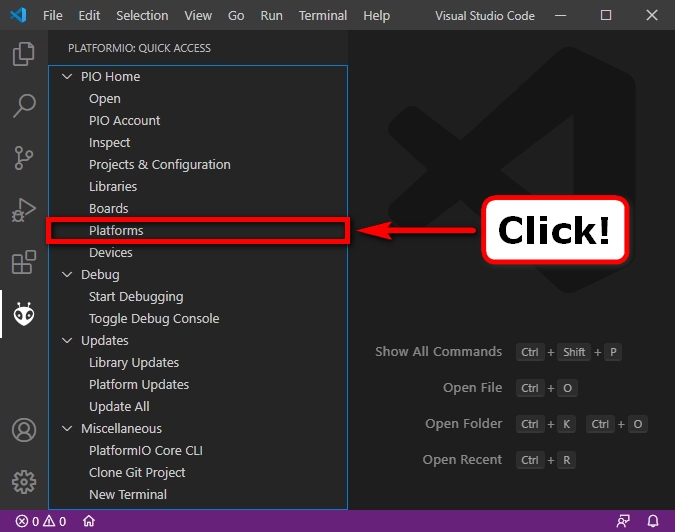
Step 3: Select the Platforms option from the PlatformIO Quick Access menu.
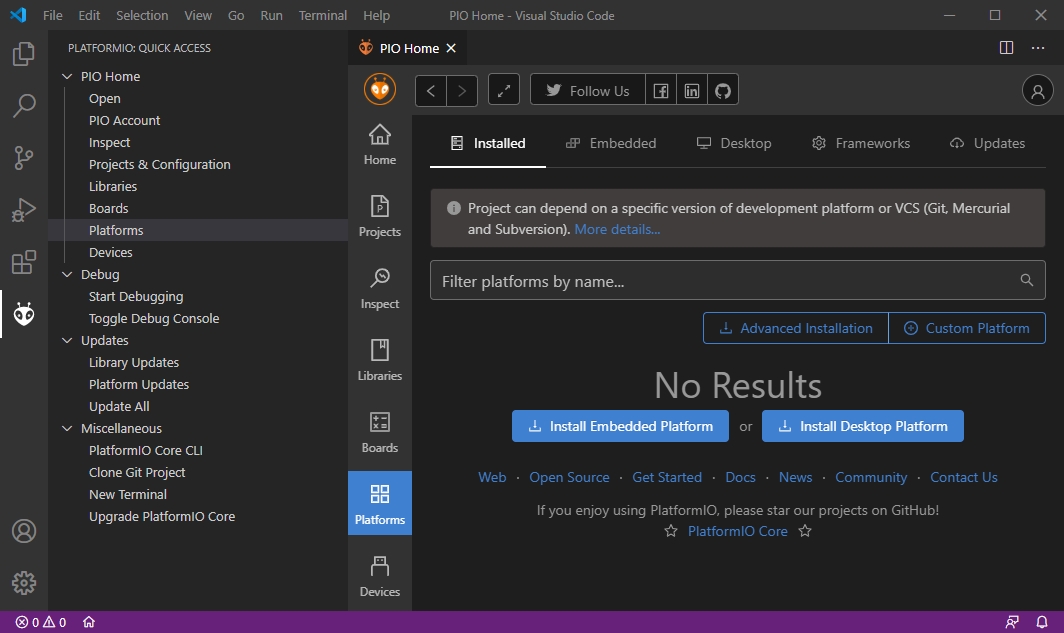
The following new window should appear next to the quick access menu…
Note: Any existing platforms you have already installed will be listed here.
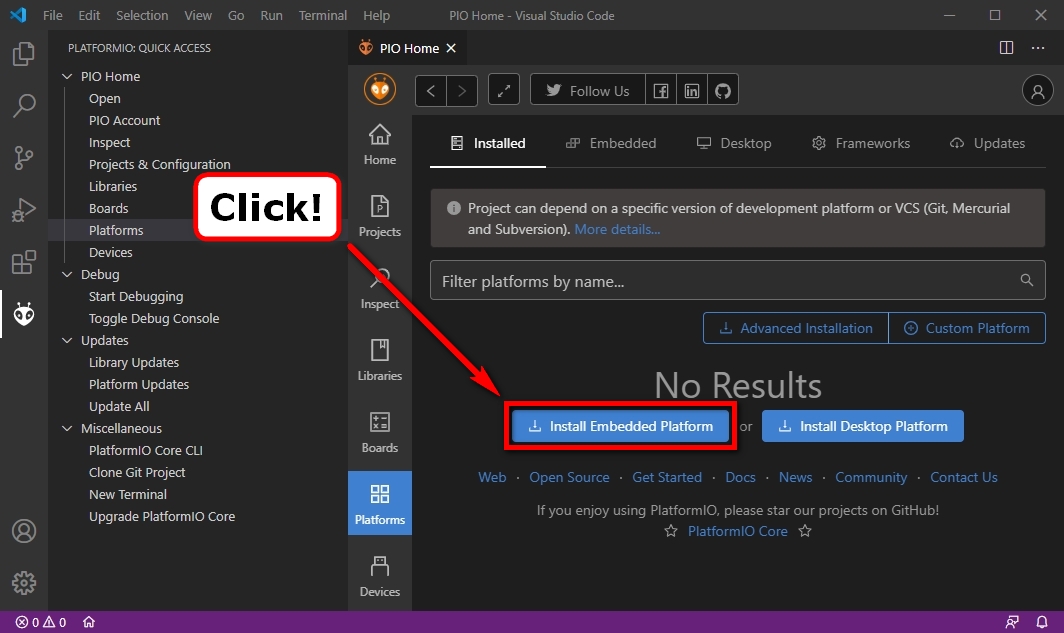
Step 4: Click on the blue Install Embedded Platform button.
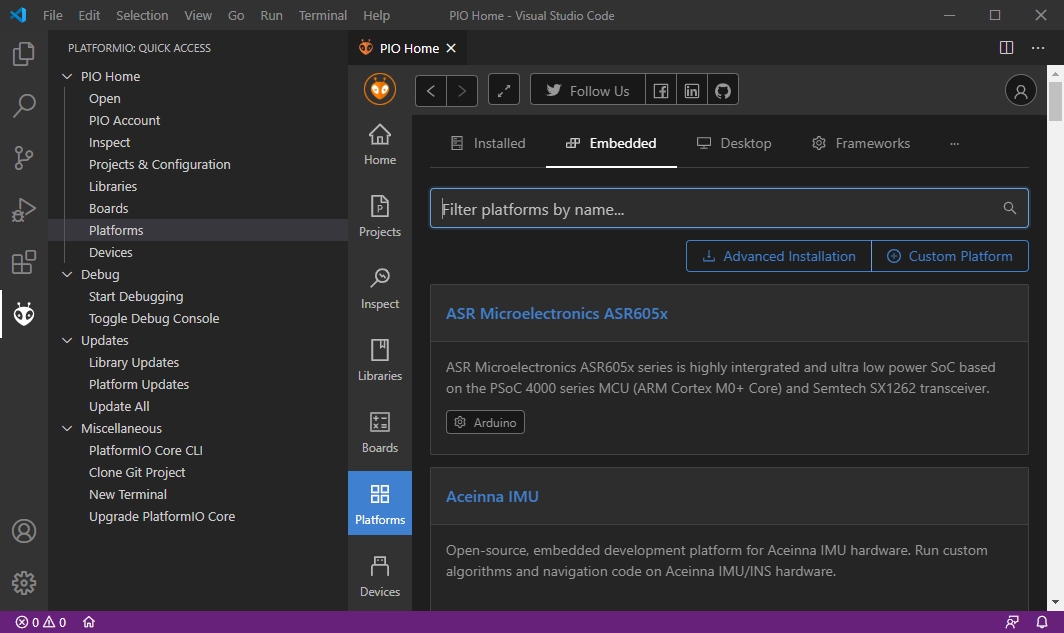
The Embedded tab should now be displayed in the existing window.
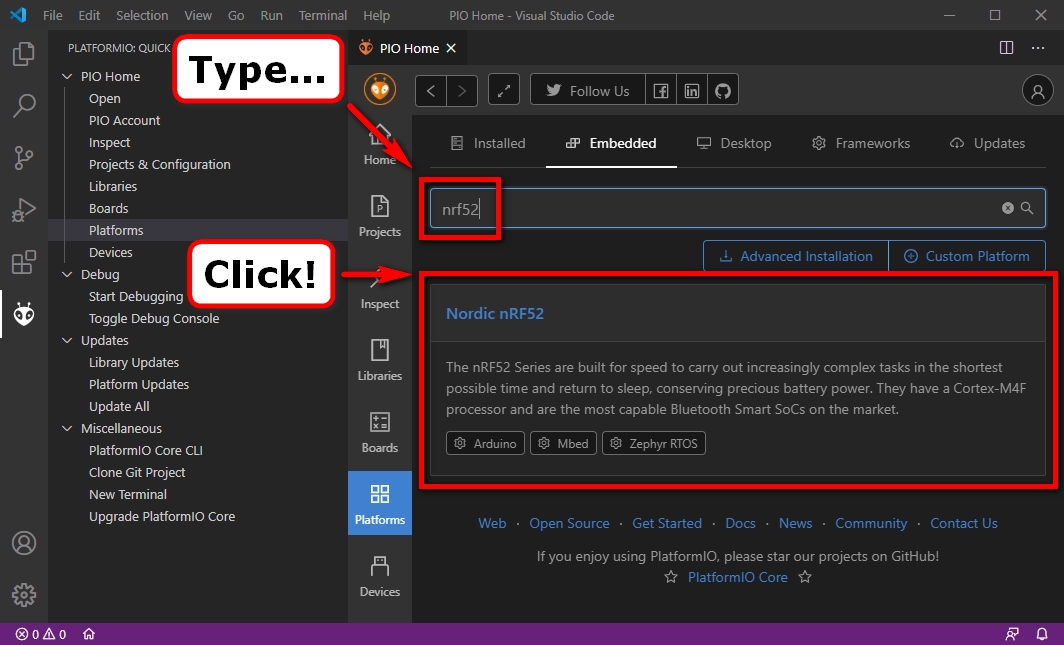
Step 6: Type the following in the “Filter platforms by name…” dialog box:
nrf52
And select the Nordic nRF52 platform when it is displayed.
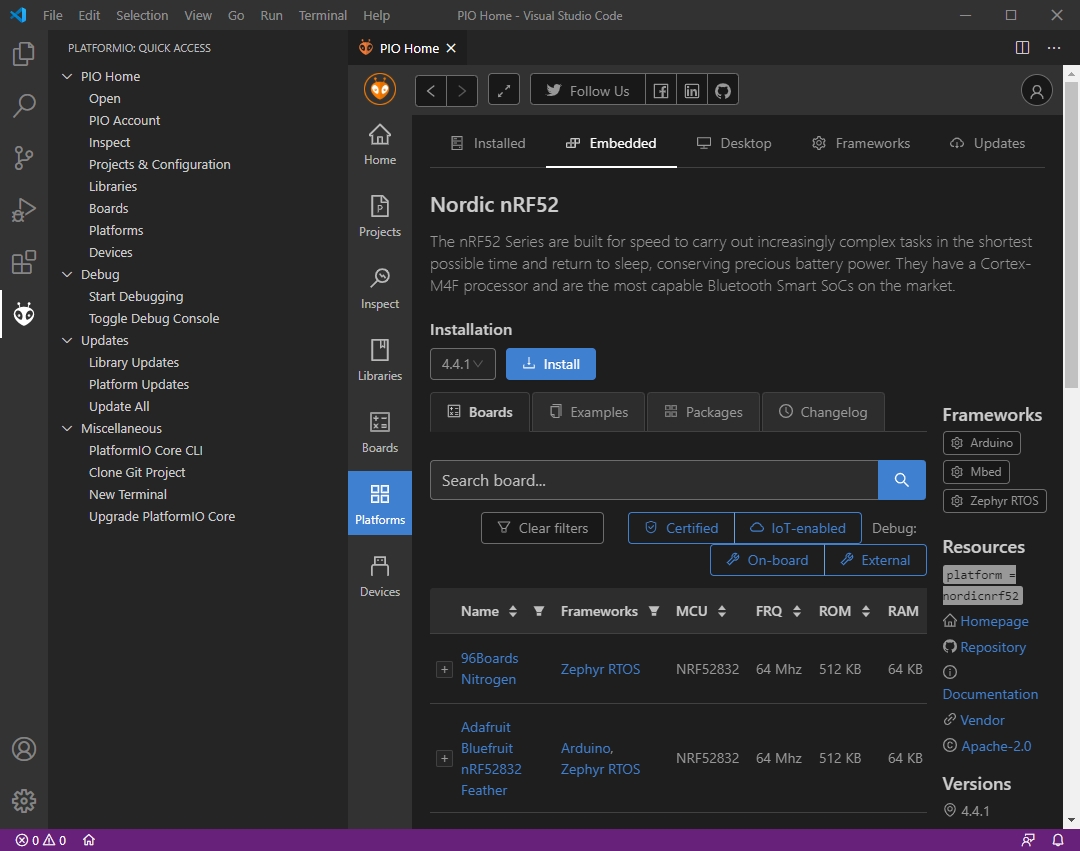
Information about the Nordic nRF52 platform should now be displayed in the existing Embedded tab.
Note: Nordic nRF52 platform version 4.4.1 is being shown in the screenshot below.
Step 7: Click the blue Install button to download and install the Nordic nRF52 platform.
The Nordic nRF52 platform will now be installed and the following message will be displayed if the installation completes successfully:
Note: Click the blue OK button to close the message window.
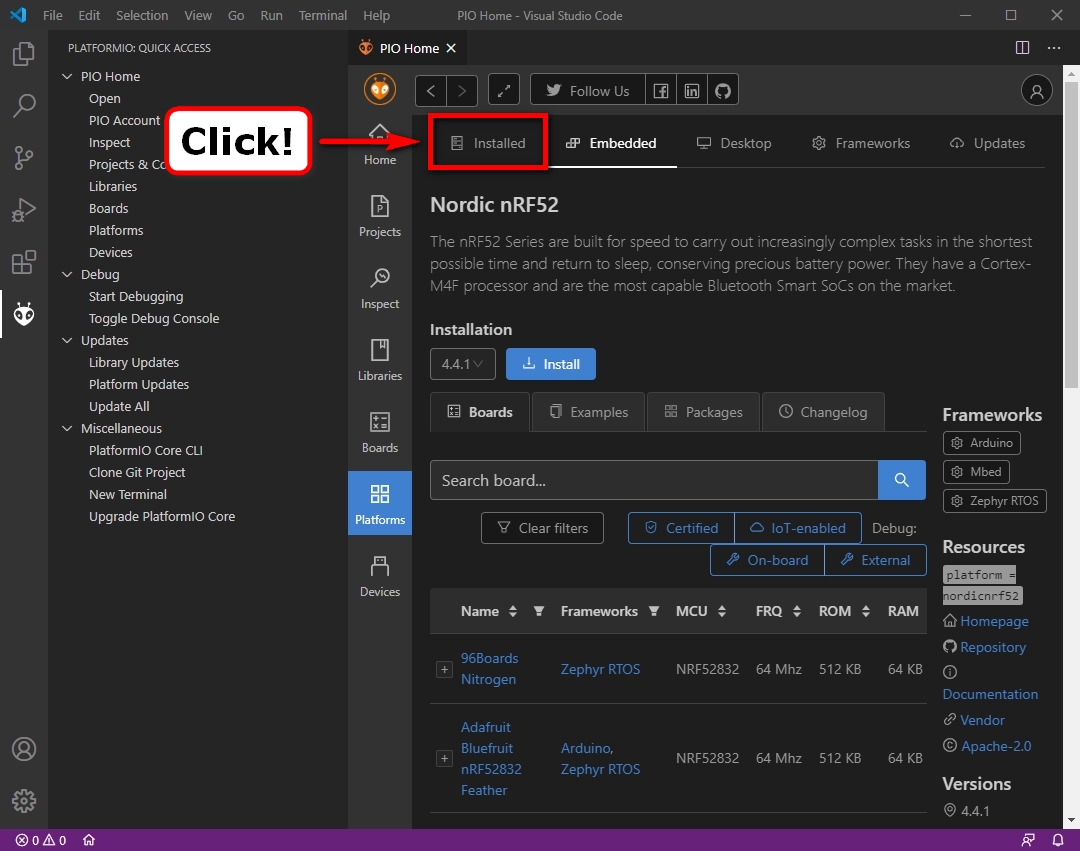
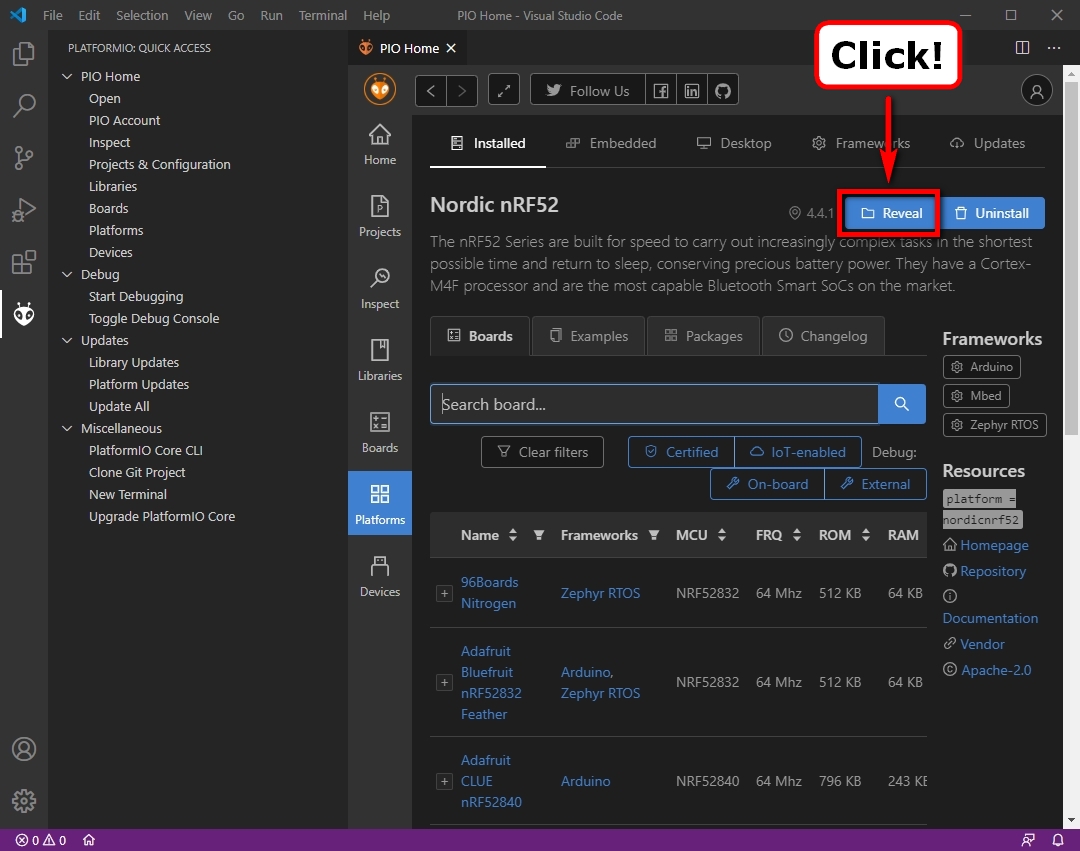
Step 8: Click on the Installed tab to display information about the newly installed Nordic nRF52 platform.
Note: If you have more than one platform installed, you need to specifically select the Nordic nRF52 platform by clicking on it in the listing after the tab is clicked.
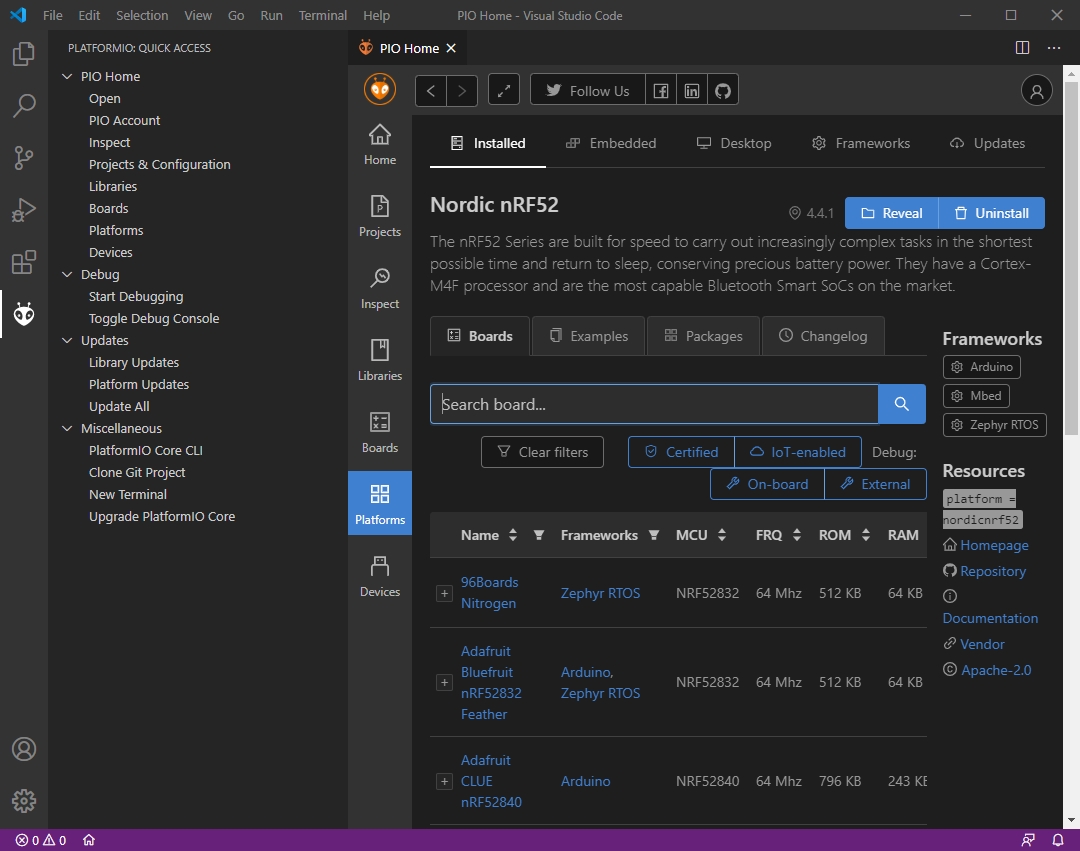
You should see something like the following displayed about the Nordic nRF52 platform under the Installed tab:
Step 9: Click on the blue Reveal button to open the directory where the Nordic nRF52 platform has been installed.
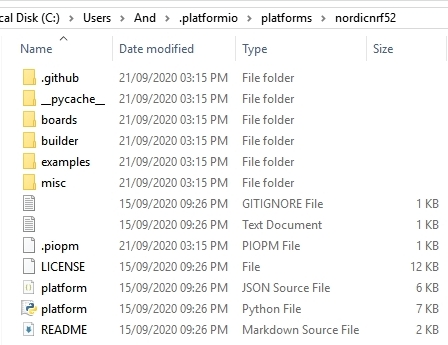
Your operating system should now open a directory listing that looks something like the following:
Note: If you have any additional platforms already installed, they will be listed here.
Step 10: Navigate up one level to the .platformio directory – it should look something like the following:
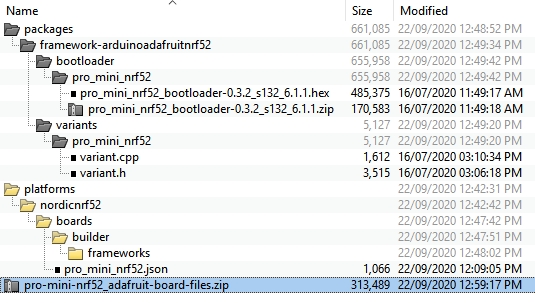
Step 11: Download and extract the ZIP archive from this Github repository into the above directory.
The ZIP archive contains the following files and internal structure:
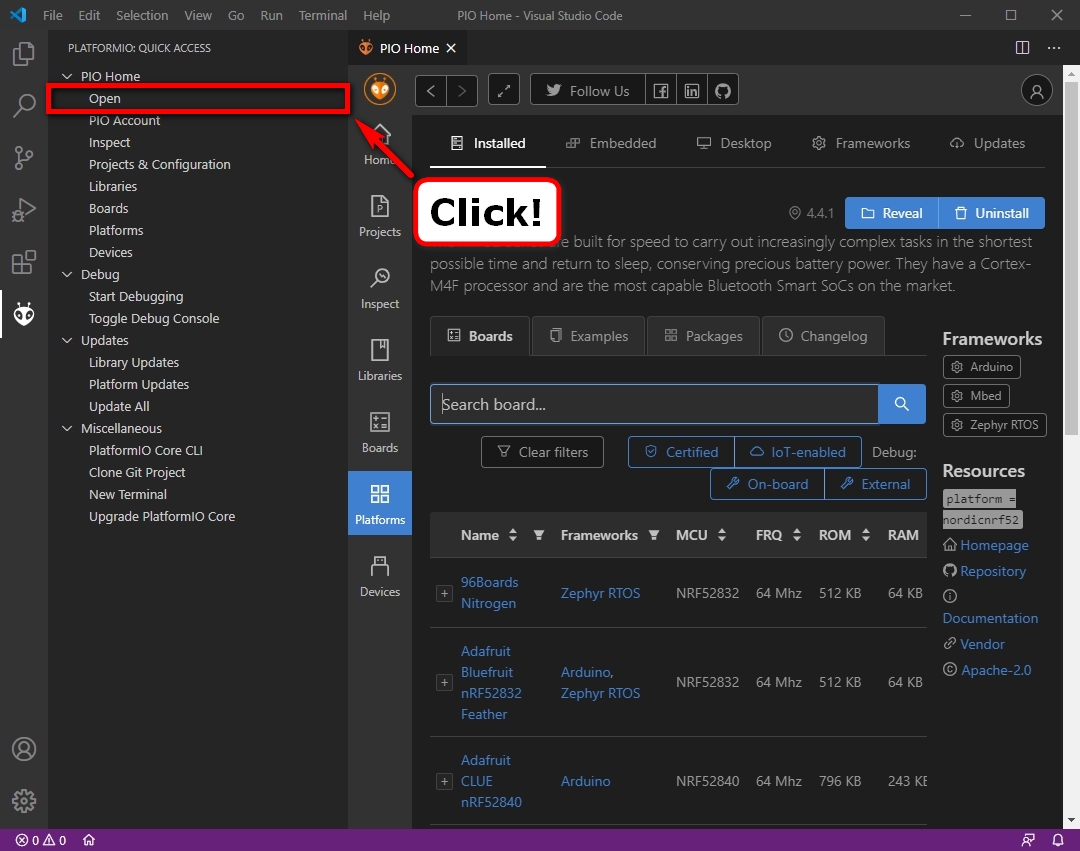
Step 12: Select the Open option from the PlatformIO Quick Access menu.
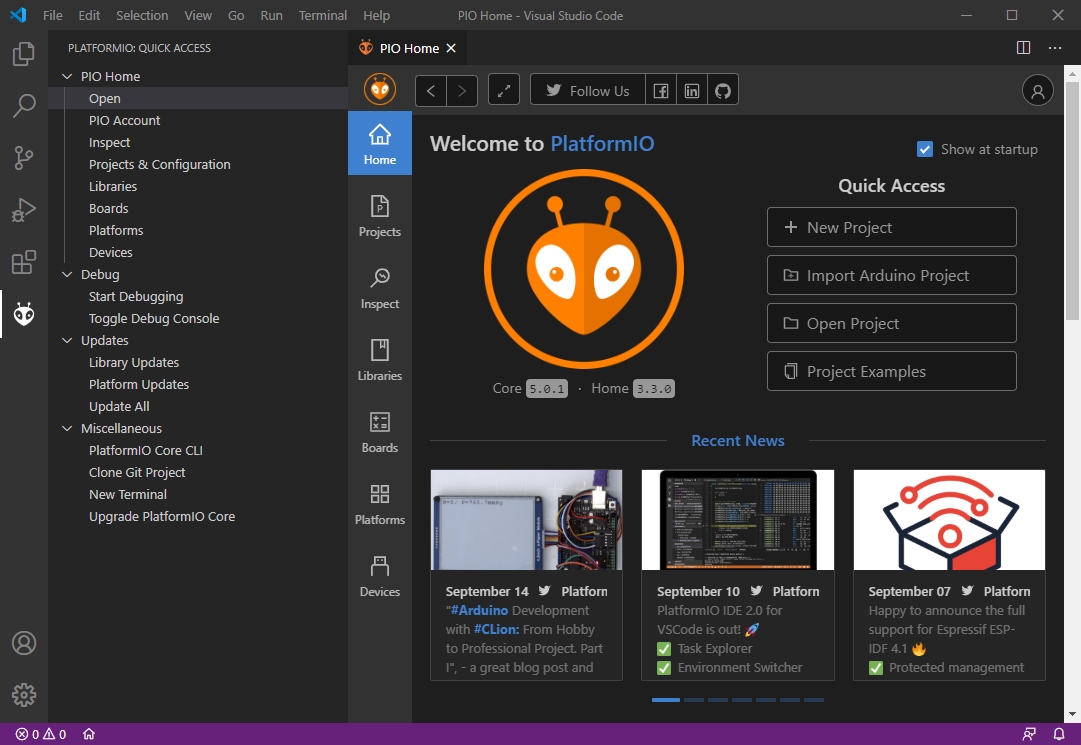
The PlatformIO home page should now be displayed:
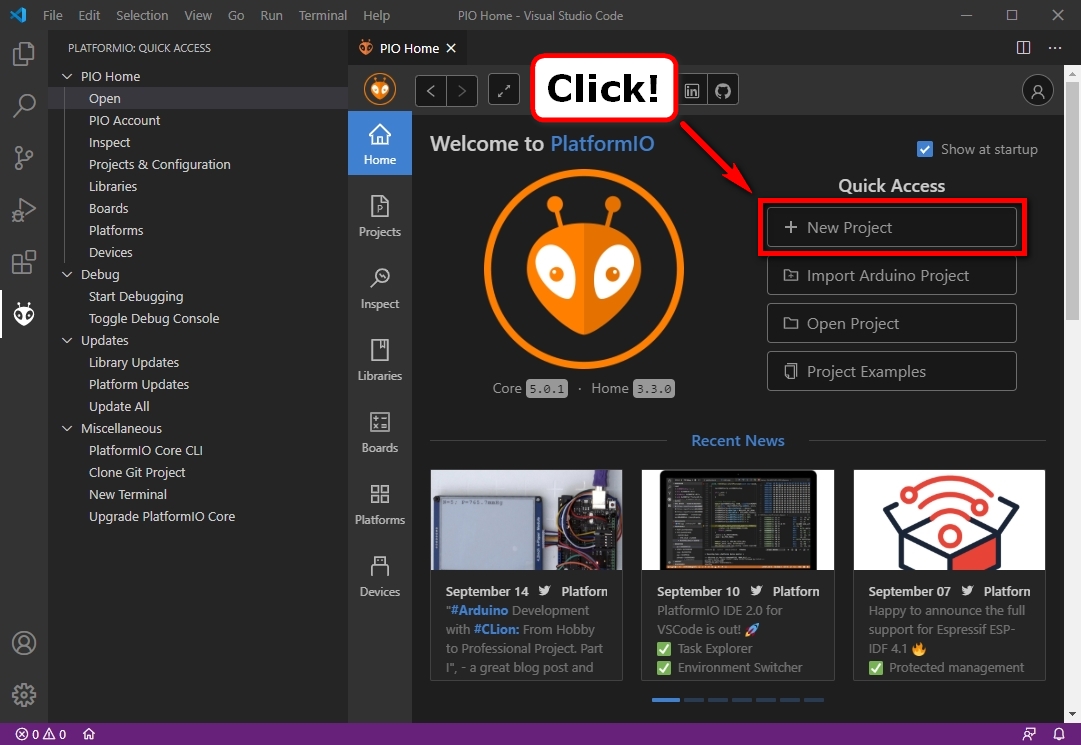
Step 13: Click the New Project button under the Quick Access options.
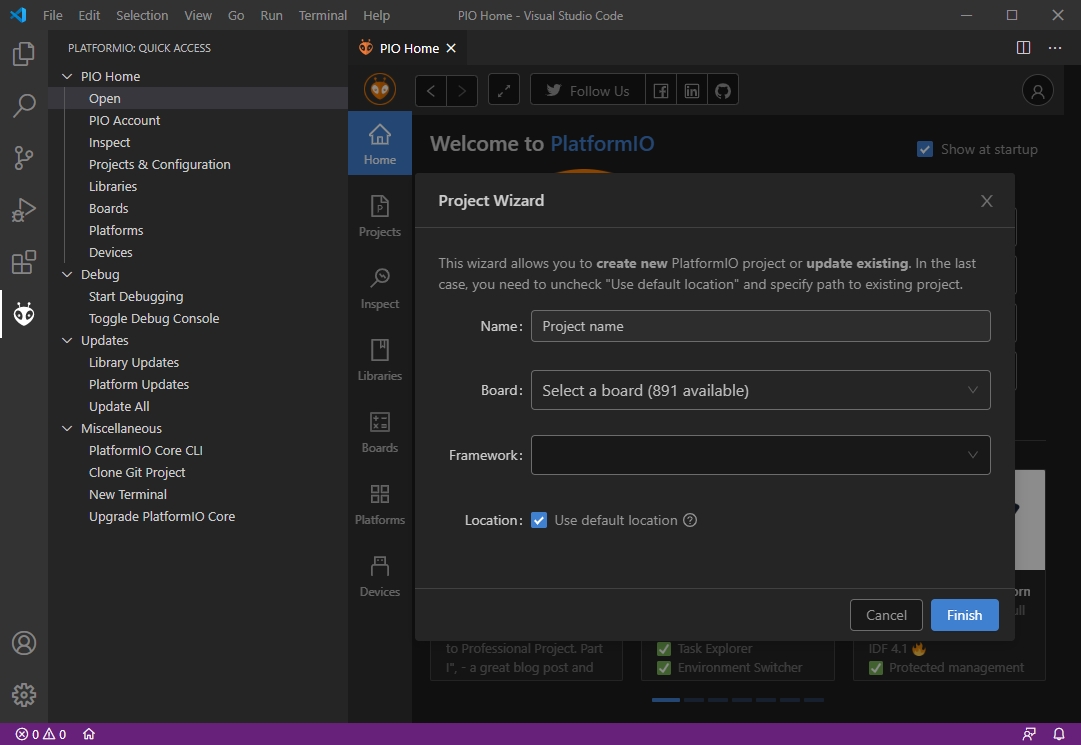
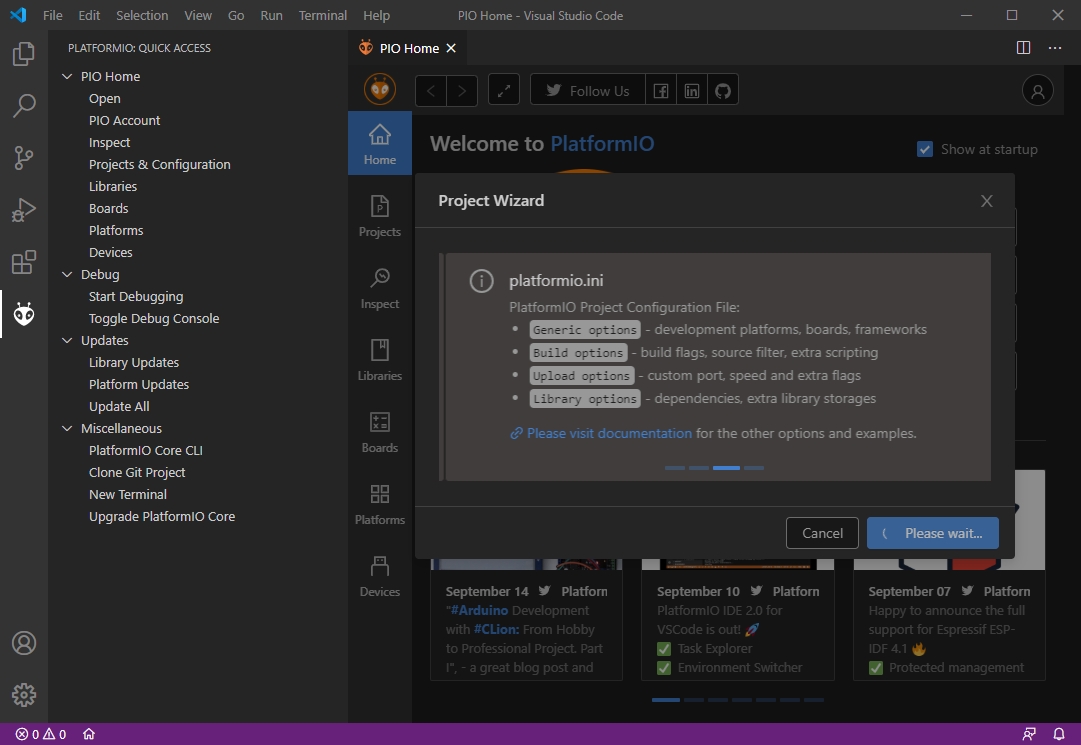
The PlatformIO Project Wizard should now be displayed:
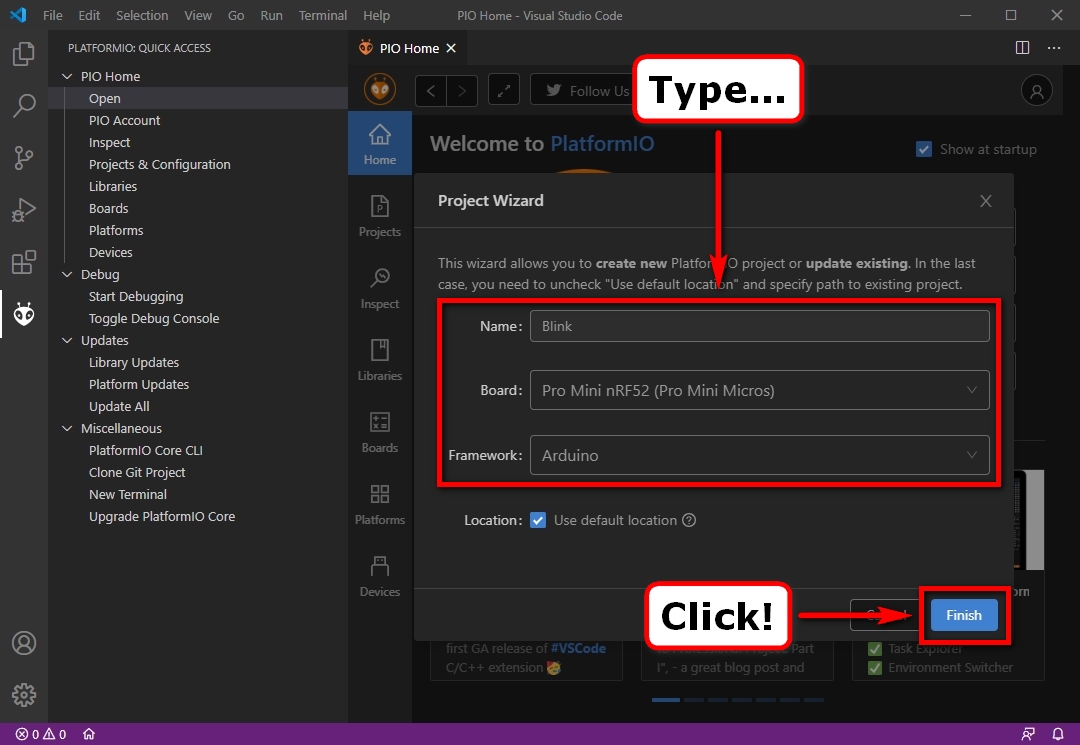
Step 14: Select the following options in the Project Wizard window dialog boxes and then click the blue Finish button:
     Name: (Choose Your Own Project Name)
    Board:  Pro Mini nRF52 (Pro Mini Micros)
Framework:  Arduino
 Location: (Use Your Default Location or Specify a Path)
PlatformIO will now create a new project using the Nordic nRF52 platform default templates for the selected board (Pro Mini nRF52) and framework (Arduino).
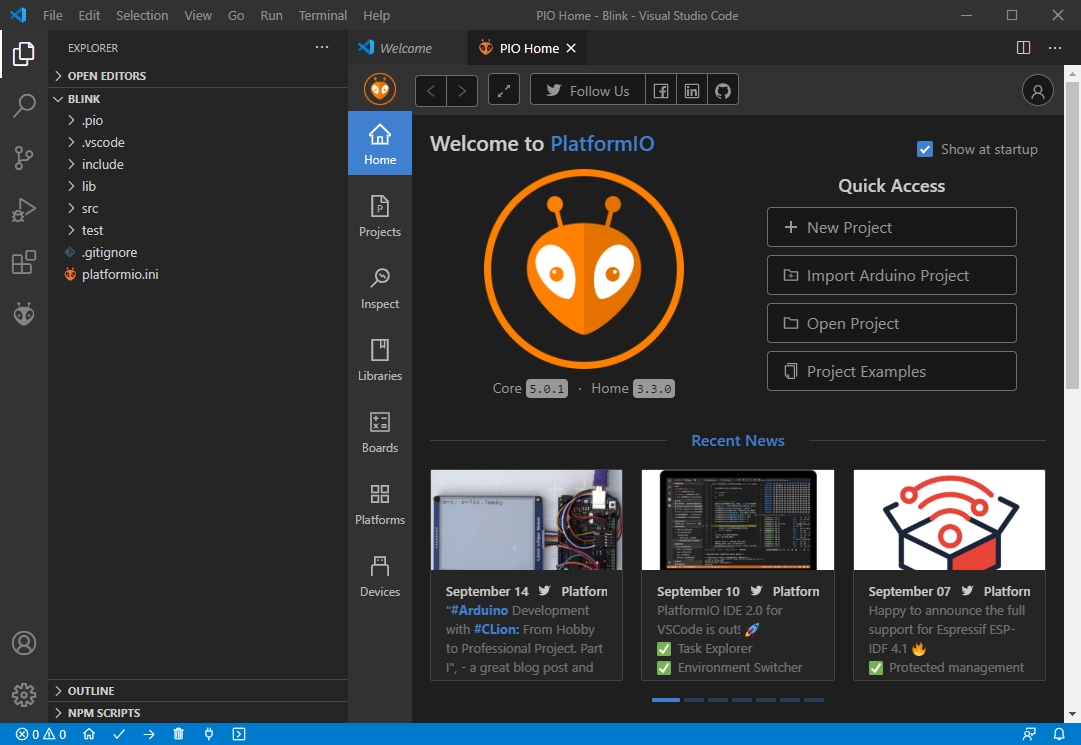
After PlatformIO has finished, the Explorer window will show the project structure and the right hand window will return to the PlatformIO home page.
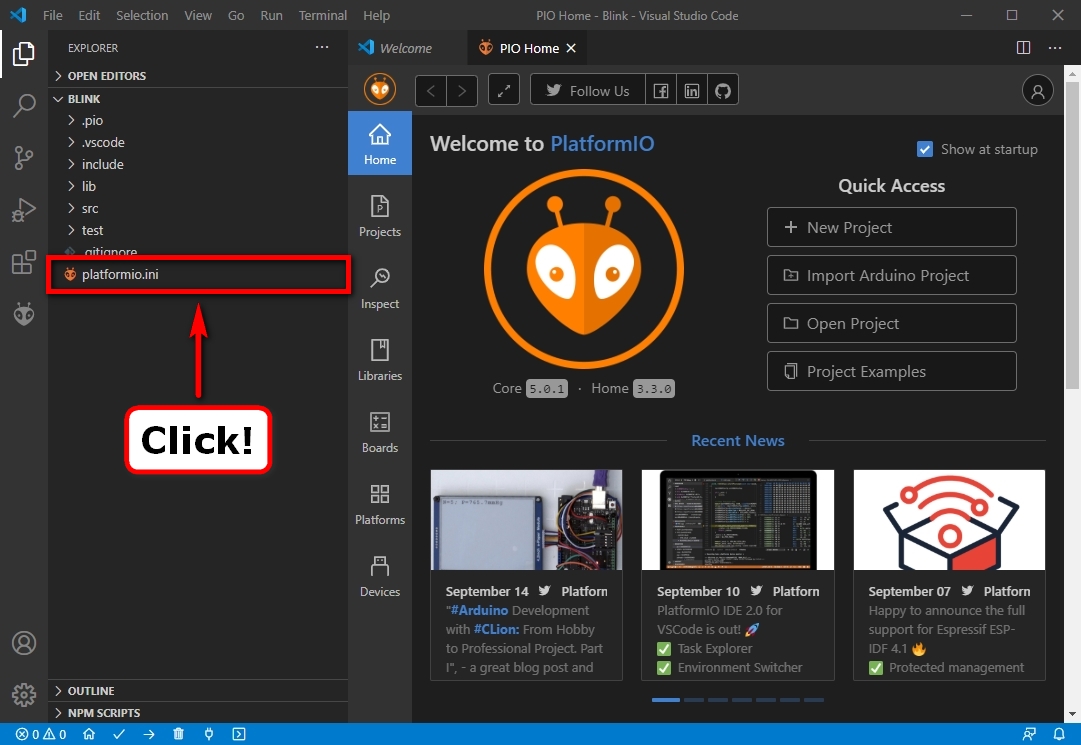
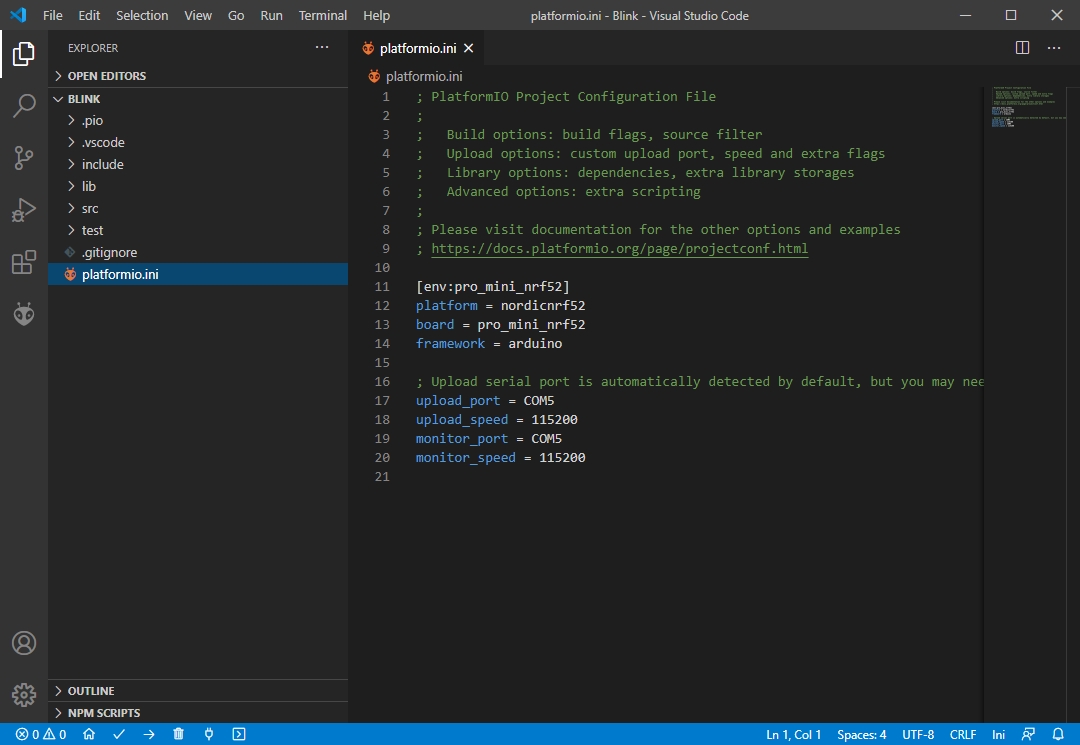
Step 15: Click on the platformio.ini file in the Explorer window to open the file for editing.
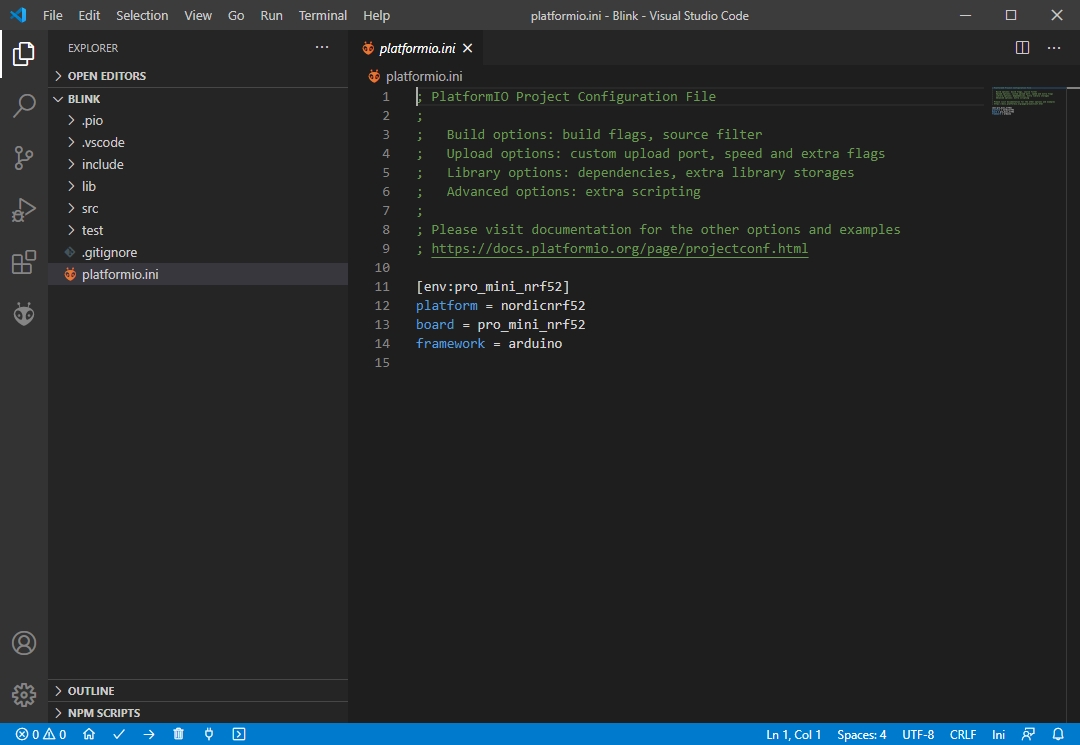
The platformio.ini file should be opened and shown in a new tab in the right hand window.
Step 16: [Optional] Update the platformio.ini file with the COM port configuration of your FTDI programmer and UART (Serial Monitor) port, if necessary:
; Upload serial port is automatically detected by default, but you may need to update it manually.
upload_port = COM5
upload_speed = 115200
monitor_port = COM5
monitor_speed = 115200
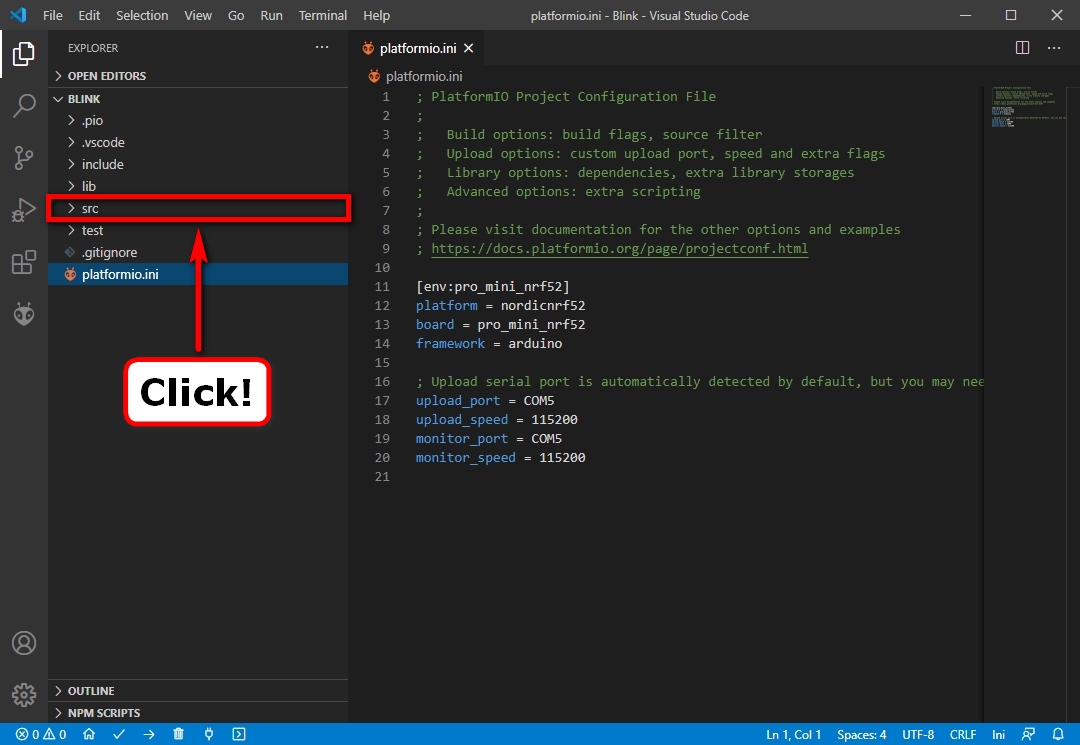
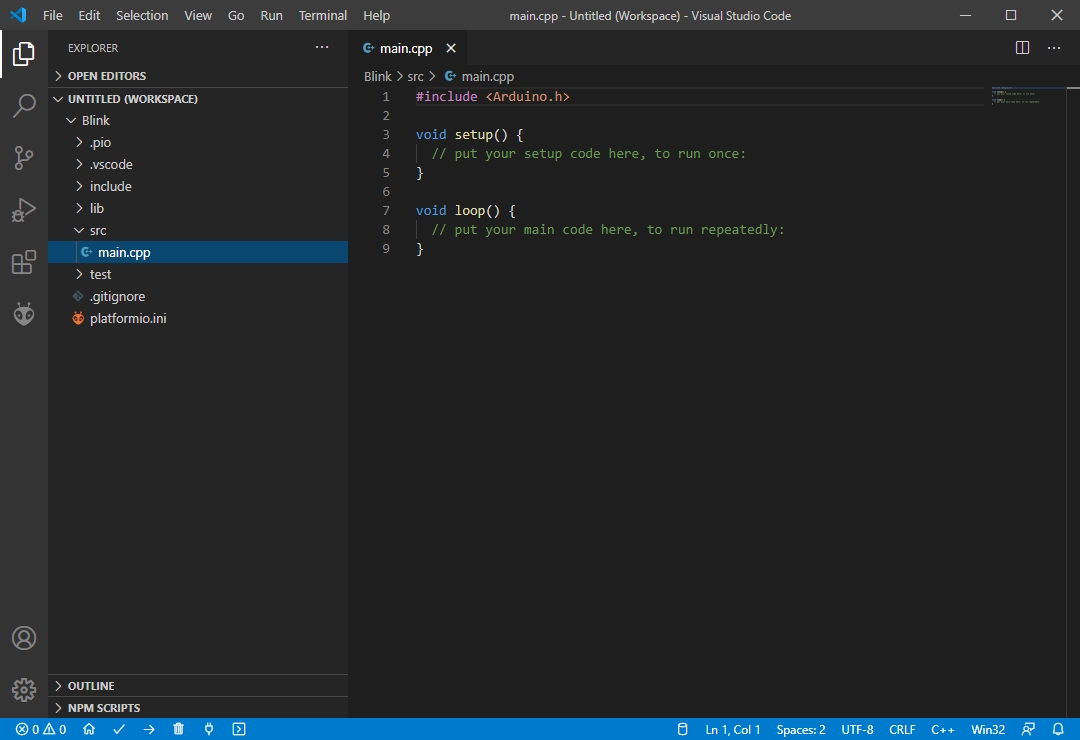
Step 17: Open the project “src” (Source) listing in the Explorer window.
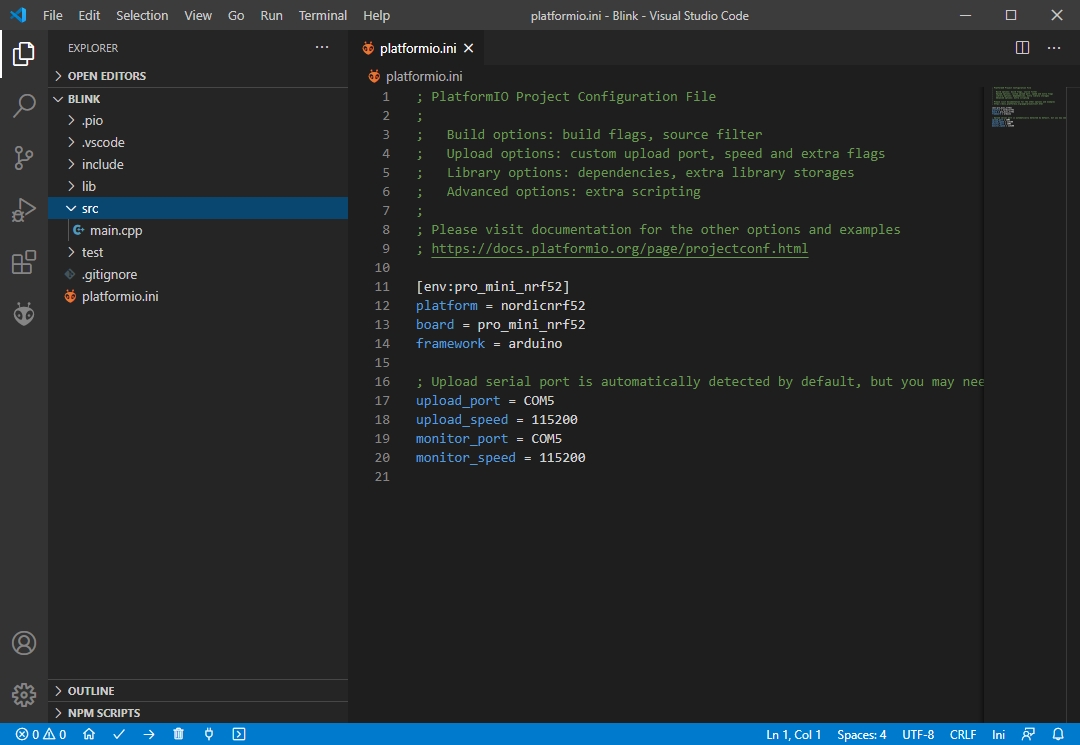
You should see the listing expand with a main.cpp file in the Explorer window.
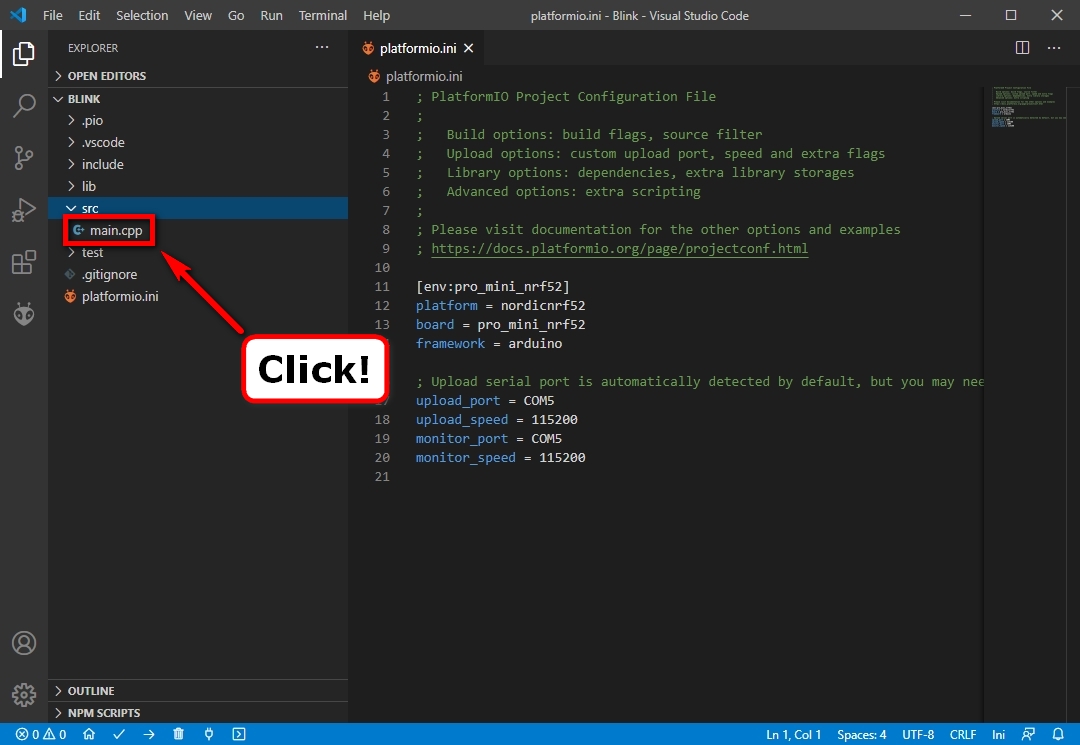
Step 18: Select the main.cpp file from the “src” listing in the Explorer window to view the source code.
You should see the main.cpp source code displayed in a tab on the right hand window.
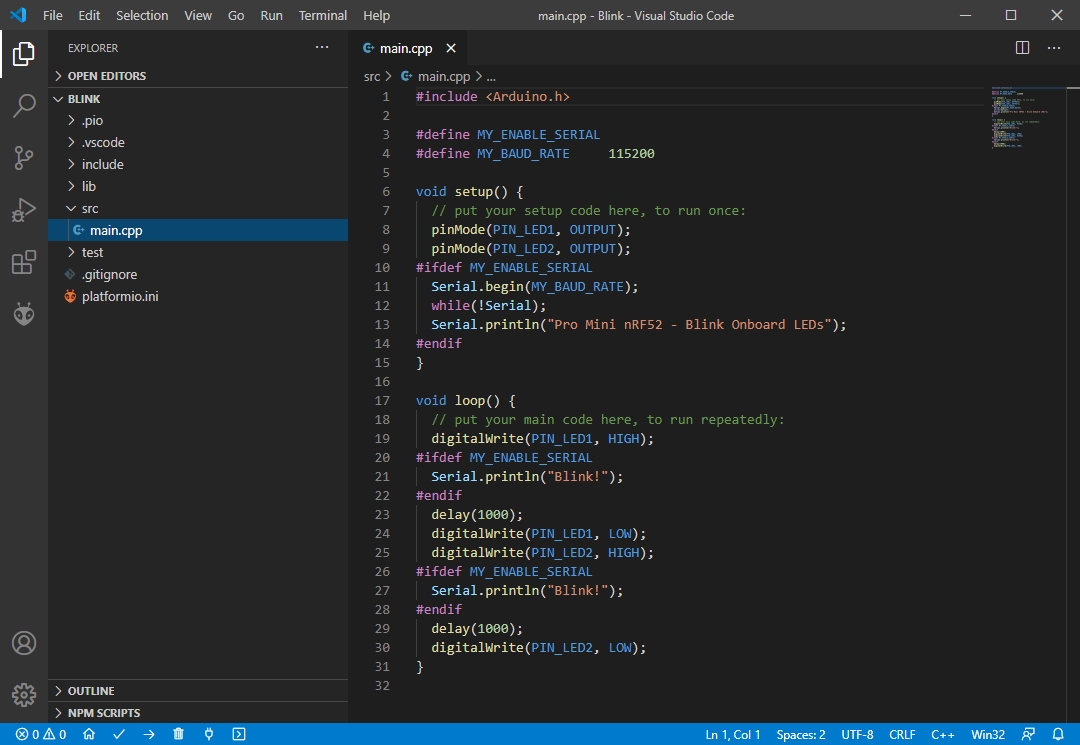
Step 19: Copy-and-paste the contents of this example main.cpp file into the main.cpp source code of the new project:
Note: The example main.cpp file simply blinks the Pro Mini nRF52’s LEDs and displays UART messages whilst doing so. Using this example code will test whether the platform has been configured correctly.
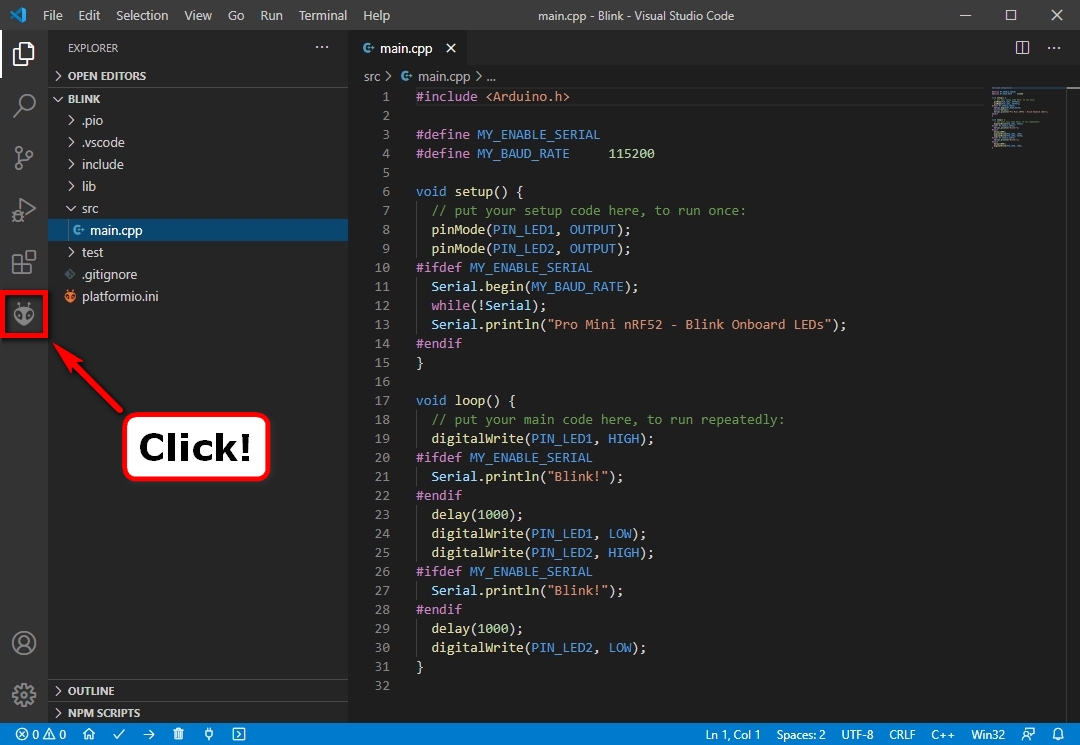
Step 20: Click on the PlatformIO extension button.
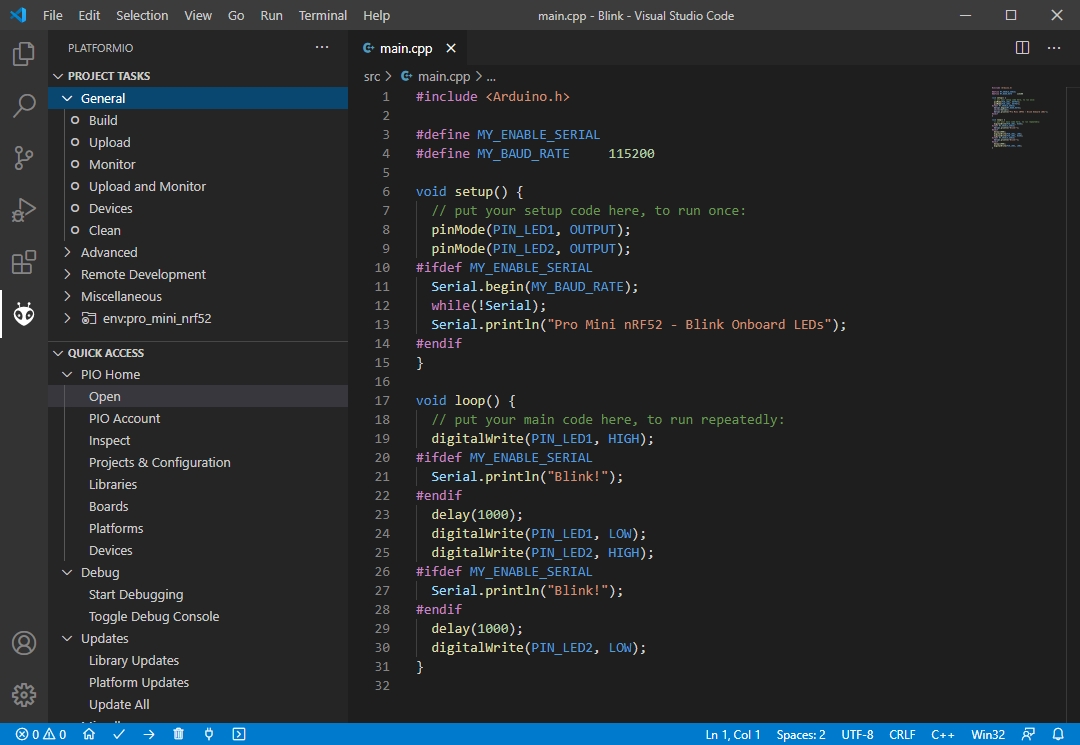
You should now see a list of PlatformIO Project Tasks together with the previous list of Quick Access options:
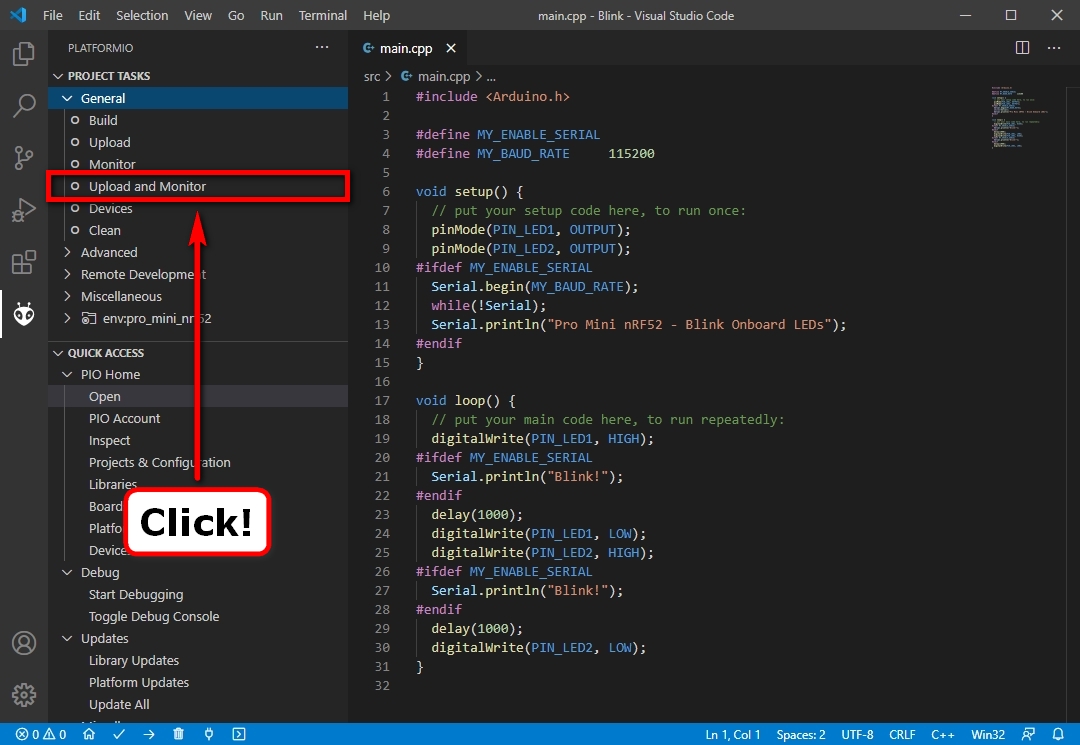
Click on the Upload and Monitor option in the Project Tasks list:
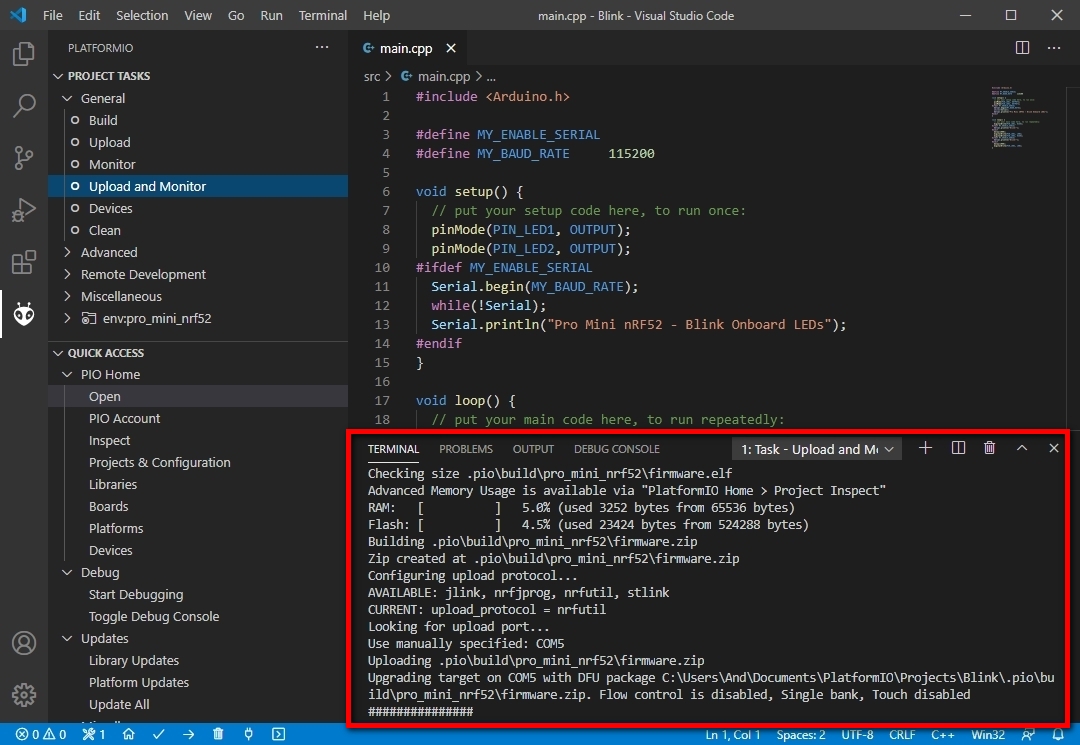
PlatformIO should now compile the project source code and attempt to upload it to the Pro Mini nRF52 via the configured FTDI programmer:
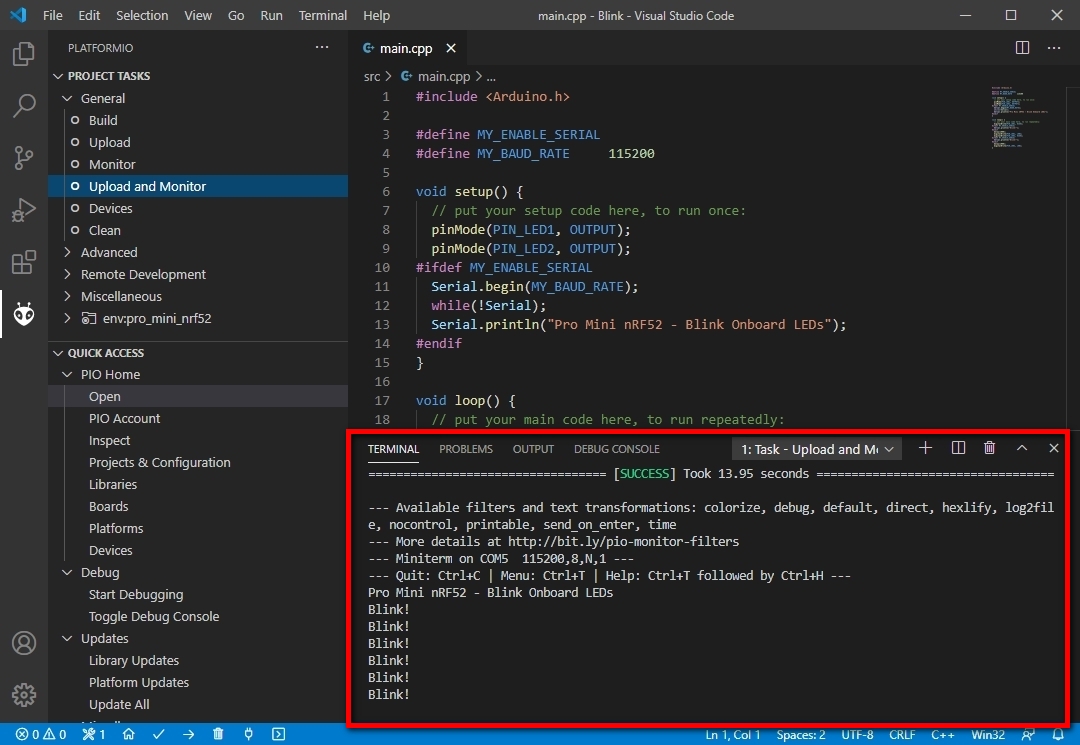
Assuming the upload was successful, PlatformIO will then start the monitor to display the UART messages:
You should now be able to use your Pro Mini nRF52 with PlatformIO.



0 Comments